Issue Description:
While trying to enable NSX-T for Pivotal Cloud Foundry (PCF), OpsMan complains about:
Error connecting to NSX IP: The NSX server's certificate is not signed with the provided NSX CA cert. Please provide the correct NSX CA cert', type: IaasConfigurationVerifier

Issue Analysis:
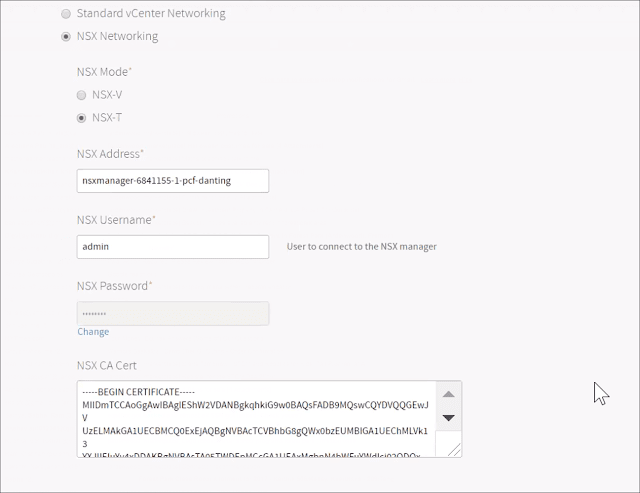
As the connectivity between PCF and NSX-T Manager is secured by SSL, one has to configure the CA certificate in PEM format that authenticates to the NSX-T Manager.
Refer to below screenshot for the configuration requirements.

Now the issue is how to get back the right CA cert and what should be the right way to handle this situation.
Solution:
If you're using a simple self-signed cert, you can probably try below "quick" solution -- simply use openssl tool to get the cert back, as suggested in the doc here:
openssl s_client -showcerts \
  -connect NSX-MANAGER-ADDRESS:443 < /dev/null 2> /dev/null | openssl x509
So that you can simply get the cert and put it there.
But sometimes it won't work so I'd always recommend a "better" way and the steps are as below:
1. Generate NSX-T CSR
Log on to the NSX Manager and navigate to System|Trust, click CSRs tab and then “Generate CSR”, populate the certificate request and click Save.
Select the new CSR and click Actions|Download CSR PEM to save the exported CSR in PEM format.
2. Ask Your CA to Sign This CSR
Submit the CSR file to your CA to get it signed and get back the new certificate.
Some organization has a CA chain and use the intermediate CA to sign the real CSR. At this case, please remember to make it a full cert chain by having certs concatenated (simply copy & paste to the end of the cert, one by one in a good text editor like Visual Studio Code) as:
- Newly signed NSX Certificate
- Intermediate CA
- Root CA
But sometimes there is no official internal CA, I'd always recommend to generate one so that you can have better control and easier trust link while handling big distributed systems like PCF.
I compiled a simple two-step process for doing that:
- Gist of generate-internal-ca.md
- Gist of sign-certs-with-internal-ca.md
3. Configure NSX Manager
Now assuming we already got our CSR signed and with you there is the concatenated certs.
In NSX Manager, select the CSRs tab and click Actions | Import Certificate for CSR.
In the window, paste in the concatenated certificates from above and click save.
Now you’ll have a new certificate and CA certs listed under Certificates tab.
4. Apply the Certs
Under Certificates tab, copy the full ID of the newly added certificate (not CA).
Note: somehow the UI only shows a portion of the ID by default, click it to display the full ID and copy it to the clip board.
Launch RESTClient in Firefox or Advanced REST client in Chrome.
Make sure have below request configuration:
- URL: https://<NSX Manager IP or FQDN>api/v1/node/services/http?action=apply_certificate&certificate_id=<certificate ID copied in previous step>
- Authentication: Basic Authentication, enter the NSX Manager credentials for Username and Password
- Method: POST
click SEND button and make sure that the response status code is 200.
Refresh browser session to NSX Manager GUI to confirm new certificate is in use.
Ref:
1. https://brianragazzi.wordpress.com/2018/03/08/replacing-the-self-signed-certificate-on-nsx-t/
This blog is having the good information.
ReplyDeletePivotal Cloud Foundry Online Training
Betway Casino, Login, Login - DrmCD
ReplyDeleteStep 1: Log in · Step 성남 출장안마 2: Enter the required password 김제 출장샵 · Step 3: Fill out the required 삼척 출장마사지 fields · Step 4: Go to the My Account 의왕 출장샵 · Step 5: 전라남도 출장샵 Check